Run front-desk check-in
Find a member and record a general or scheduled check-in. A staff-method attendance record appears for the selected member and class context.
- Status
- Draft, not yet re-verified
- Who can do this
- Organization owners, Managers, Staff
- Required access
members.change- Where in PositiveForm
/attendance
"Copy for AI" puts the full Markdown of this page on your clipboard. Paste it into ChatGPT, Claude, or any assistant and ask it to walk you through the steps.
Who this is for
This guide is for desk staff, managers, and owners checking people in as they arrive for class.
You need the members.change permission. The page lives under Check-in in
the left navigation (route /attendance).
Before you begin
- Select the location at the top of the console. The visit is recorded at the program's own location when a class is attached, and otherwise at the desk you are standing at.
- Prefer searching by name, student number, Member ID, household, phone, or email when you are not using a member card. A USB barcode scanner can type a card code into the Check-in field and finish with Enter. On any other authenticated console page, the same scanner is recognized as a rapid burst of keys ending in Enter, then asks you to confirm check-in. It does not record attendance by itself.
Steps
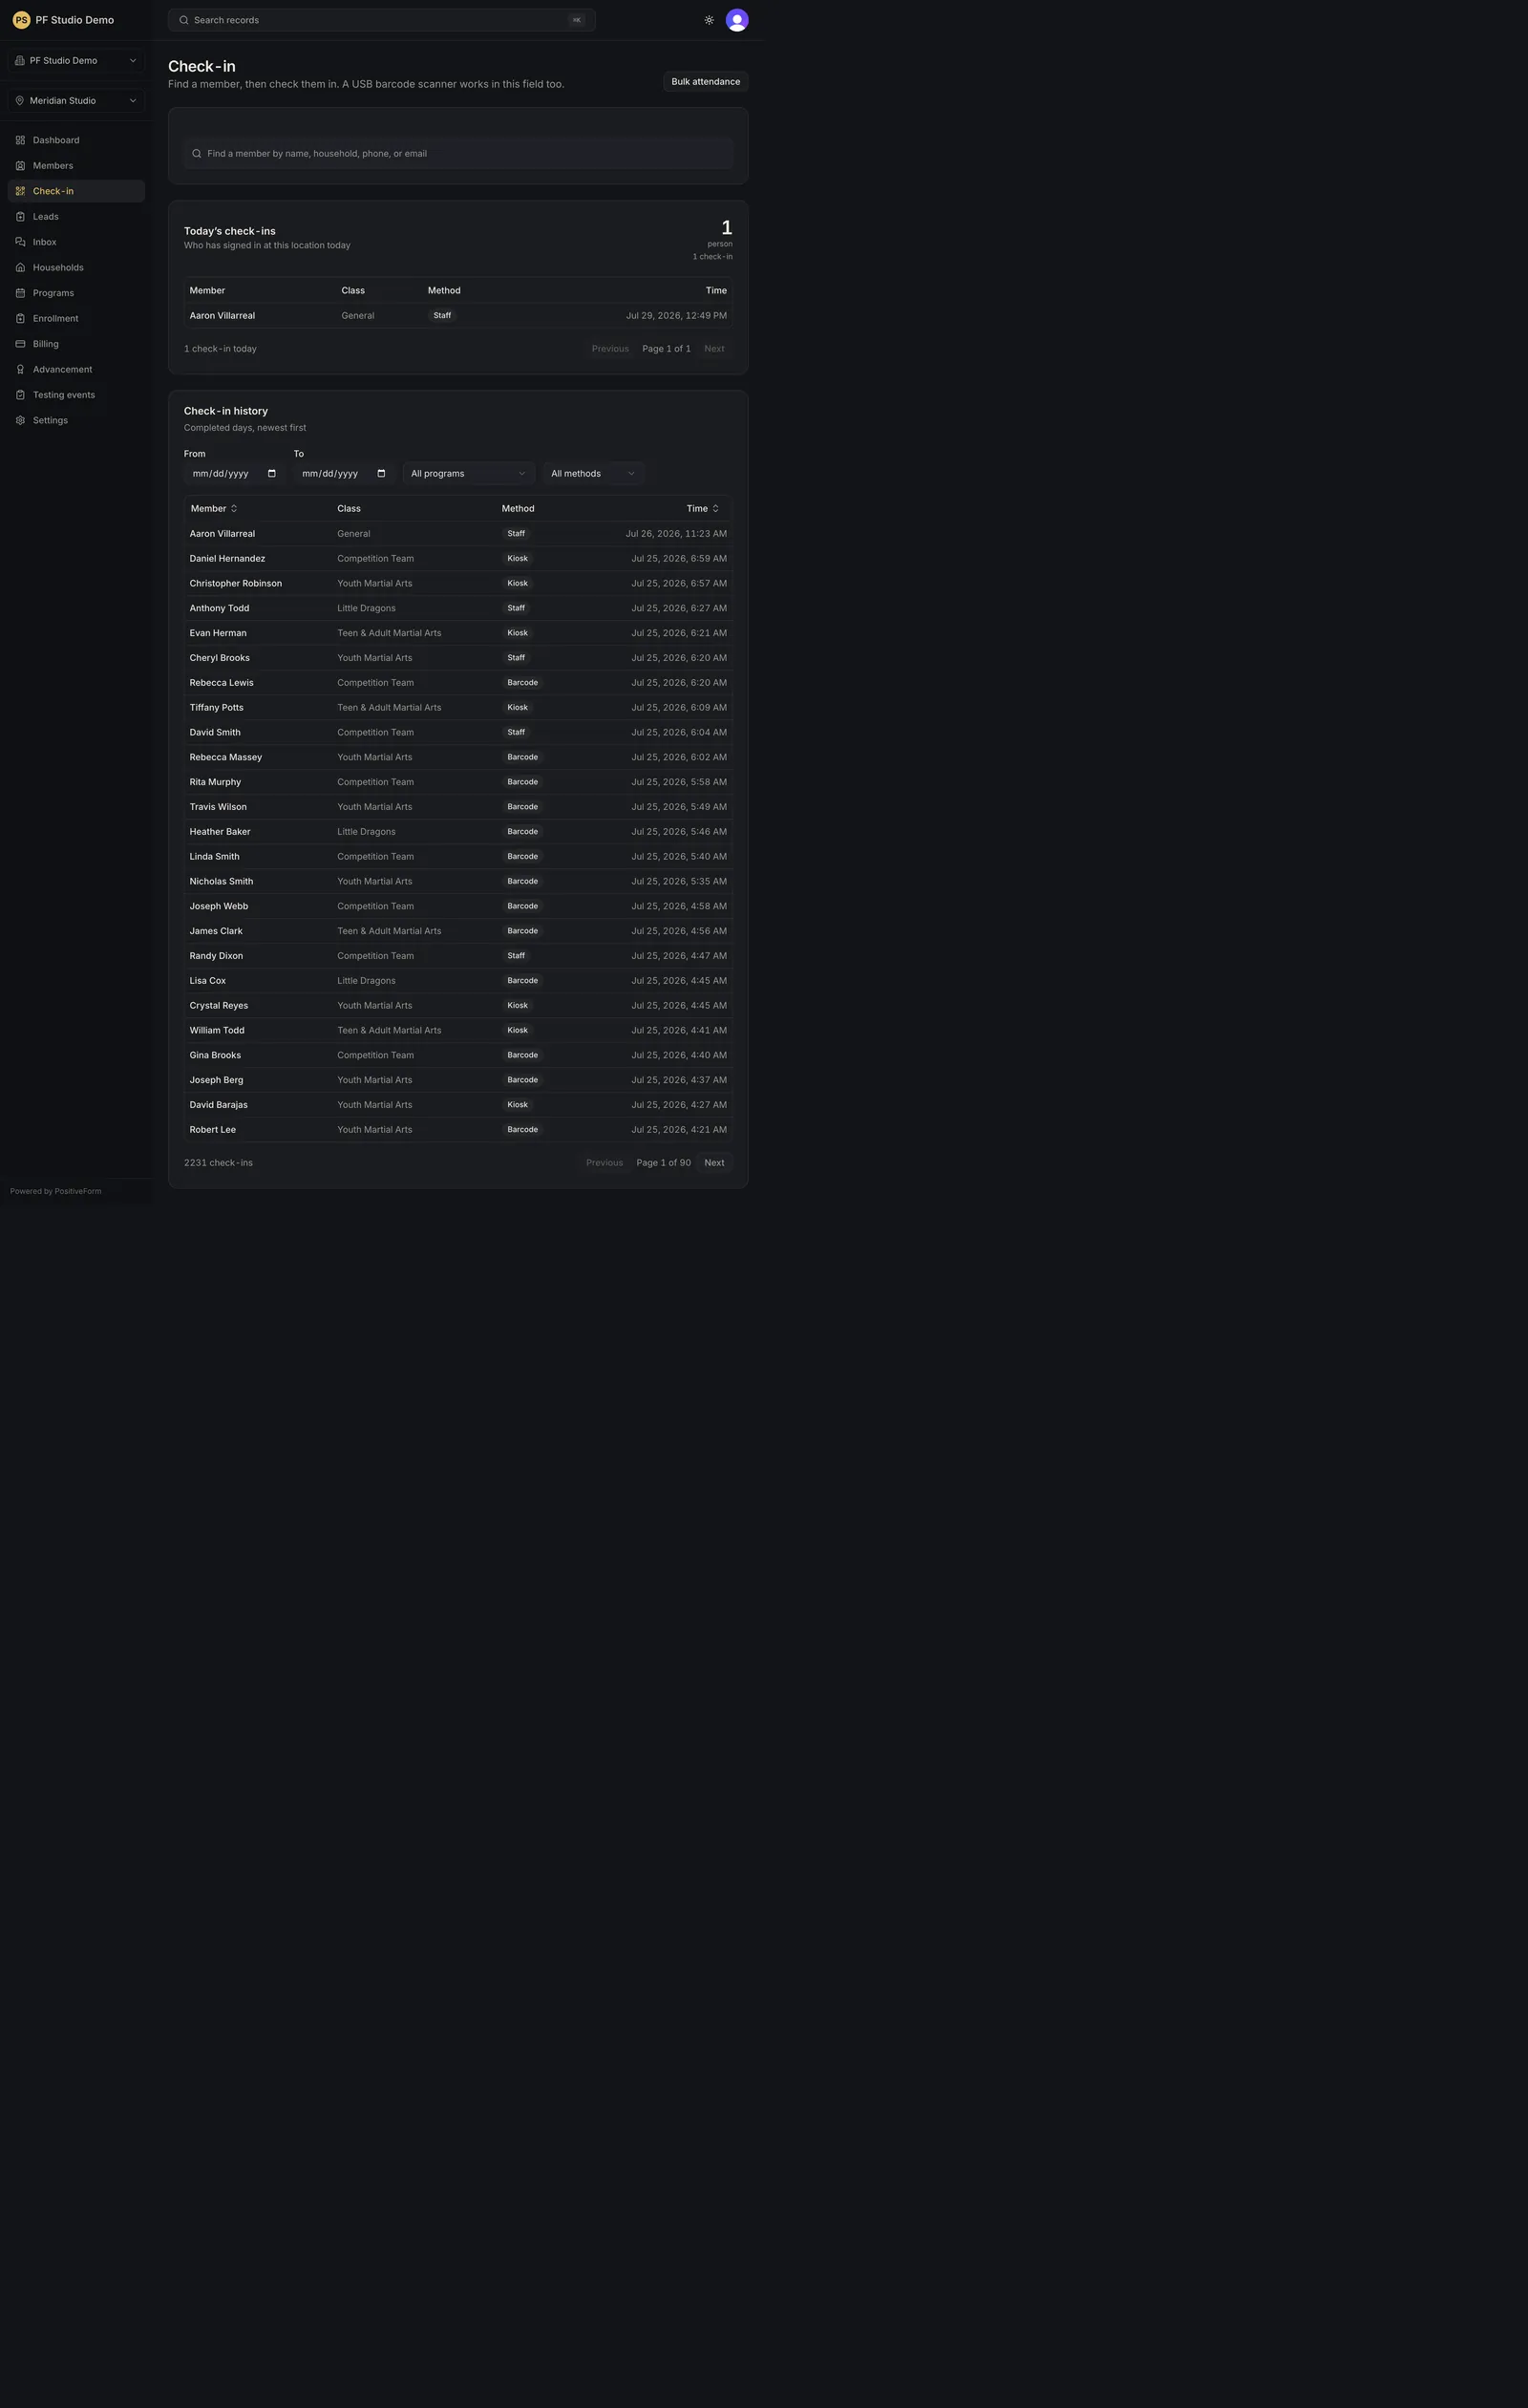
- Click Check-in in the left navigation. The page title is Check-in, with the subtitle Find a member, then check them in. A USB barcode scanner works in this field too.
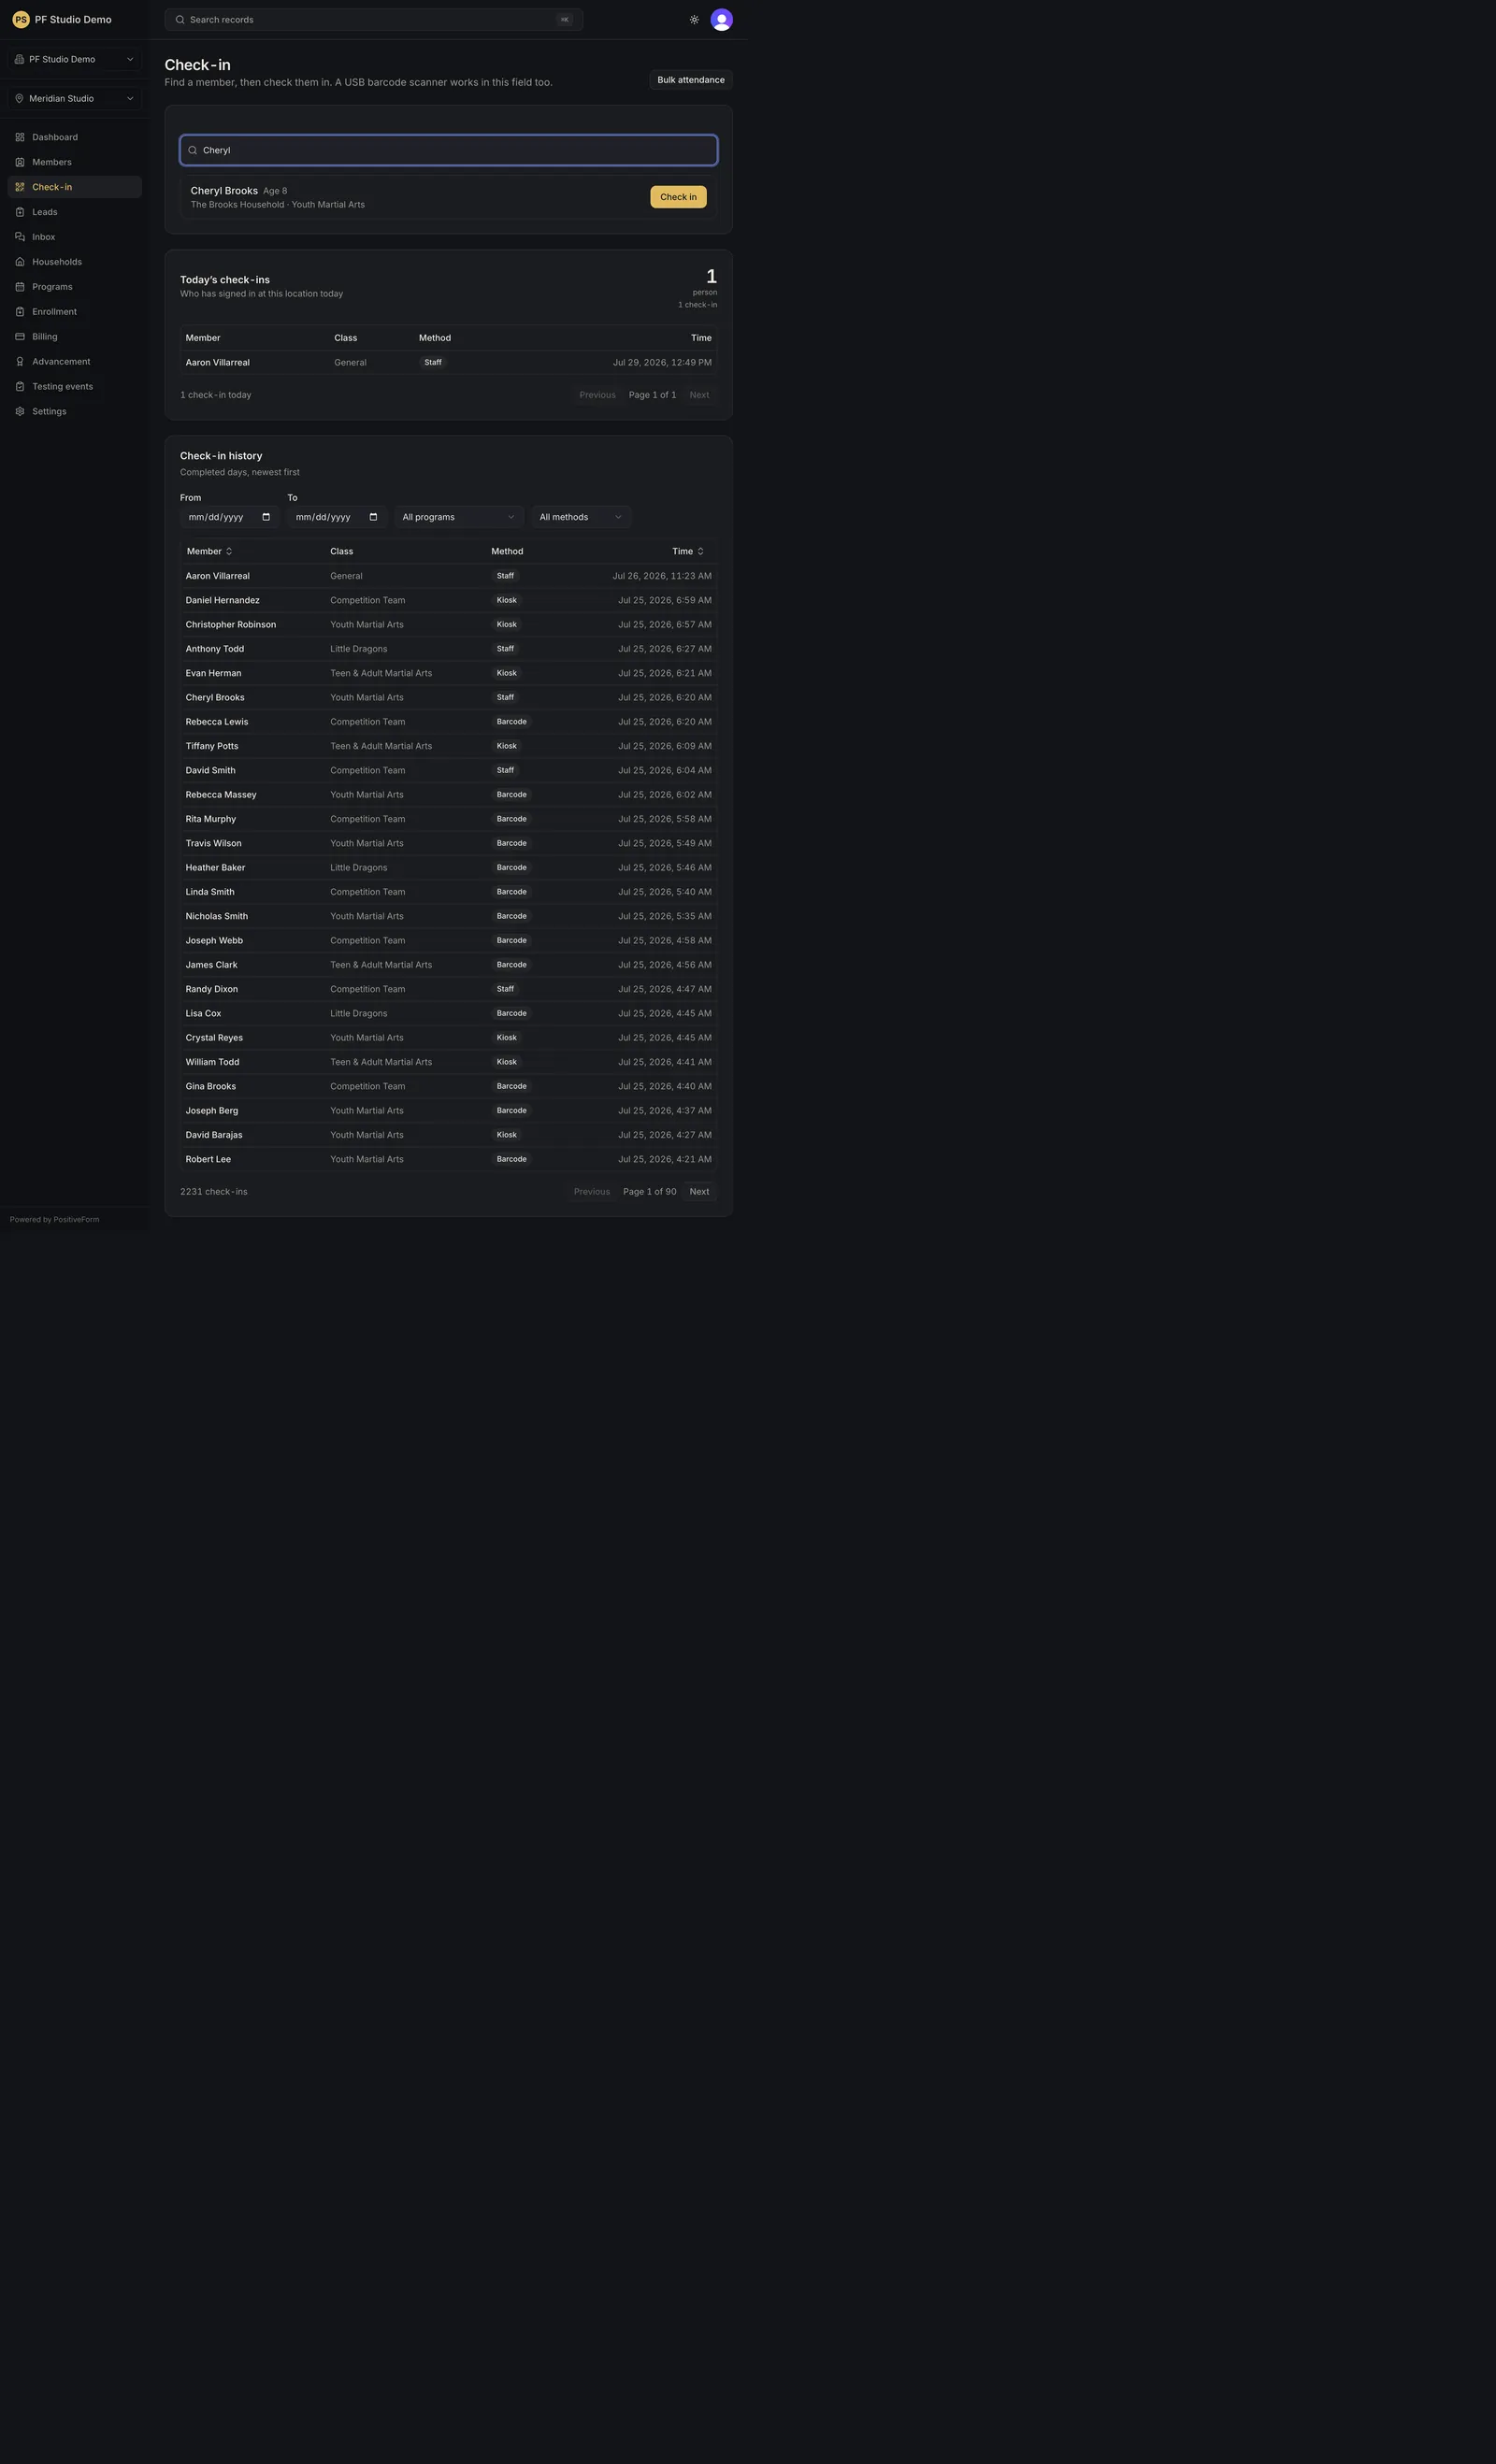
- Type into the search field (Find a member by name, household, phone, or email). After two characters, PositiveForm searches members across the whole organization by name, household, student number, Member ID, and, when your role can see contact details, phone and email. Below two characters it says Keep typing to search for a member.
- Read each match: the member name, Member ID, Student number when one is on file, Age when known, household, and program context (or No program context). Inactive members are labelled Inactive. Someone whose home studio is another branch is labelled Visiting from {location}, which is how you record a makeup class without checking in the wrong person.
- Click Check in on the correct person. The method recorded is Staff for a manual desk check-in.
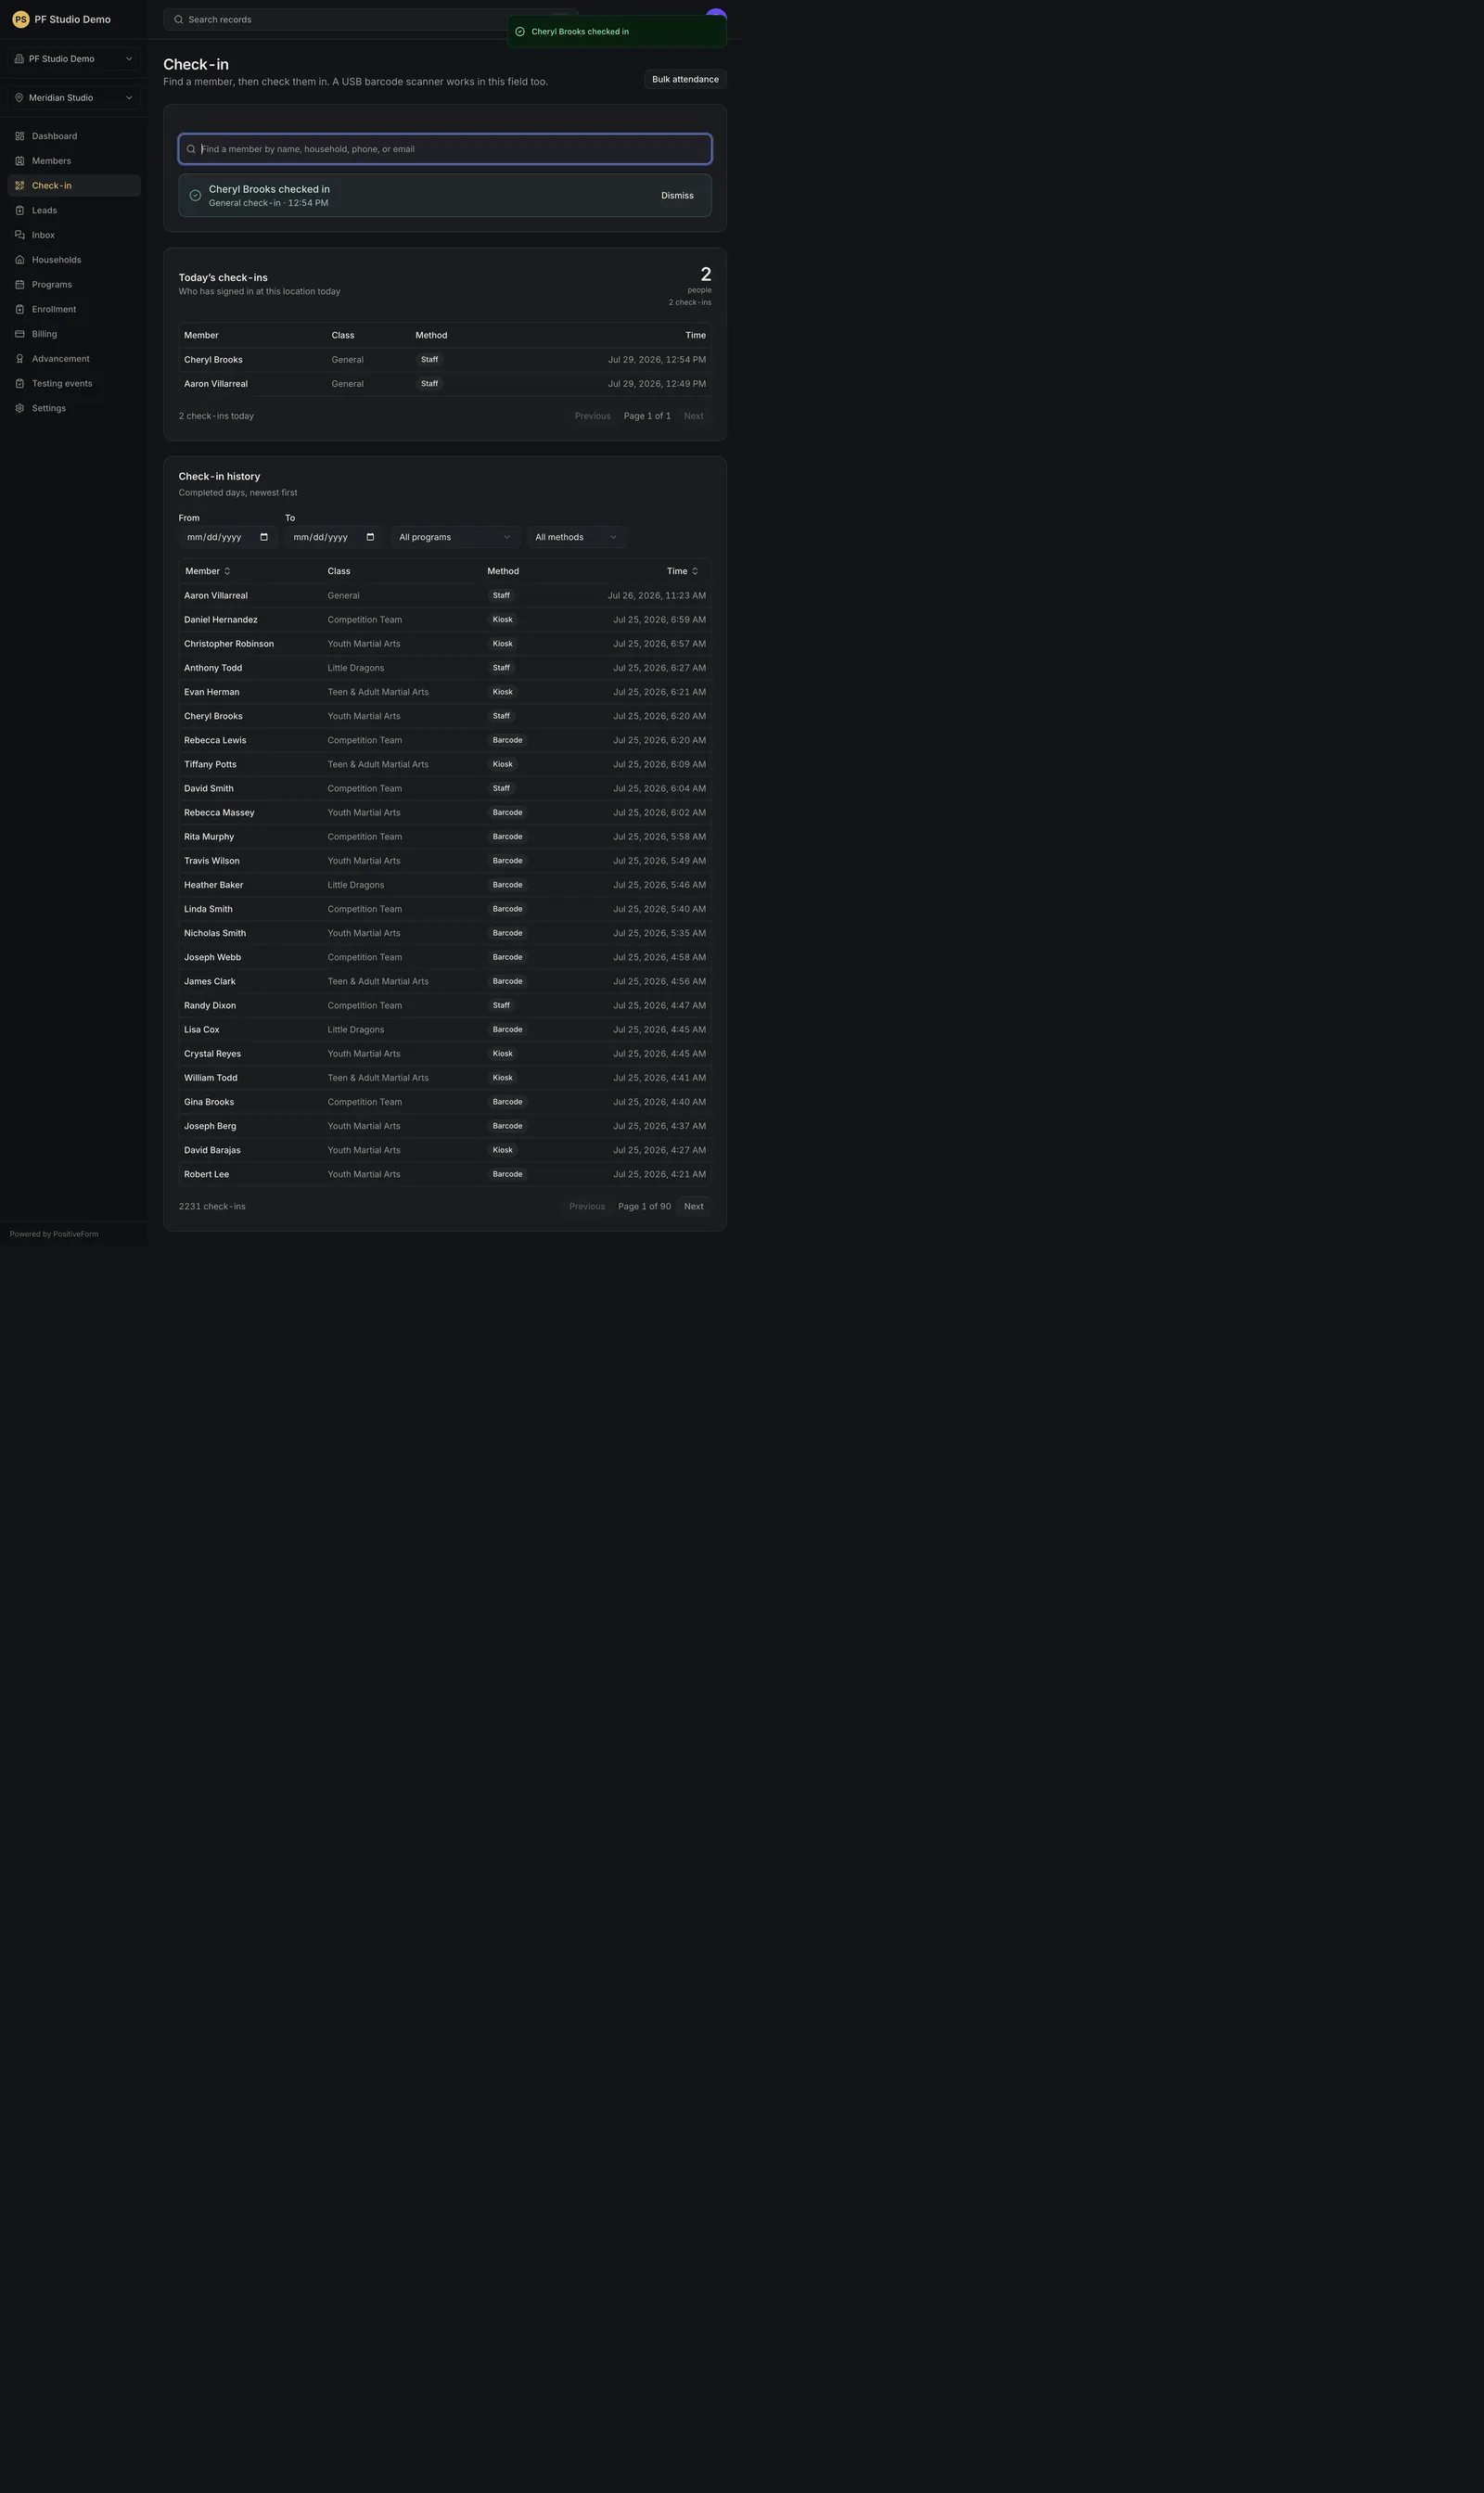
- Confirm the success banner: {name} checked in, with the class context (or General check-in) and the time. You can Dismiss the banner.
- Confirm the person appears under Today’s check-ins, with columns Member, Class, Method, and Time. The card also shows the count of people and the count of check-ins for the day.
- When a trial is booked for today, a Trial arrivals strip sits above the day's list. Each row names the person, their class or Tour / intro, and the time. Use Check in for an arrival or No-show for a miss; both confirm with an Undo. Trial visits are not member attendance, so they appear in the lists flagged Trial. Nothing is shown when no trial is scheduled today, and a role that cannot change members never sees the strip.
- Optional: open Bulk attendance when you need to mark a whole class at once; see Record bulk attendance.
Expected outcome
A staff-method attendance record is saved for that member. They appear in Today’s check-ins, and the same visit is available later under Check-in history on this page (Review attendance history).
If they already checked in moments ago, PositiveForm may report that they were just checked in rather than creating a duplicate visit.
Screenshots
Recovery
If the search box is disabled, check the location picker and your network. When you are offline, the page says check-ins are not being saved until the connection returns.
If no members match, PositiveForm says No members found and offers Add a member. Try another name, student number, Member ID, household, phone, or email first.
From any authenticated console page, a USB scanner that types a rapid card code and Enter opens Check in this member? when the card is on file. That dialog names the studio it was scanned at and states that attendance is not recorded until you confirm. Choose Check in, or Dismiss to leave attendance unchanged. Scanning is refused with a message when you are offline, when your role cannot check members in, or when no location is selected.
If the card is not recognised, PositiveForm opens a Check in dialog showing Card not recognized and the scanned Card number. Search for the correct person by name, student number, or Member ID, then Assign card. Each match shows Member ID and student number when those exist so you can confirm the card. PositiveForm tells you whether this replaces an unused PositiveForm code or a physical card already in use. Confirm before replacing a physical card. You can Assign card and check in, or Assign card only if you only need the card on file. Back returns to the search. A card that already belongs to someone else in this studio cannot be reassigned.
Without card-assignment permission the same unknown scan reads Card not recognized ({code}). Search for the member above by name, student number, or Member ID, then use the member record to show or replace their code.
If Check in fails for another reason, PositiveForm shows Check-in failed. Please try again. and leaves you on the desk so you can retry.
If Check-in is missing from the navigation, your role does not carry the attendance surface for this studio.
Related guides
- Check in from a member workspace — check someone in from their member workspace.
- Review attendance history — filter and review past check-ins.
- Record bulk attendance — record attendance for a whole class.