Create a location
Create a studio location and make it available to operations. The new location opens in settings with its profile ready for completion.
- Status
- Draft, not yet re-verified
- Who can do this
- Organization owners, Managers
- Required access
locations.manage- Where in PositiveForm
/locations/new
"Copy for AI" puts the full Markdown of this page on your clipboard. Paste it into ChatGPT, Claude, or any assistant and ask it to walk you through the steps.
Who this is for
This guide is for an organization owner or a manager: the people who open a new studio address and need it available to schedules, check-in, and billing.
You need the locations.manage permission. If Add location is not on your
Locations page, your role does not carry it. Ask an organization owner rather
than working around it; the server enforces this permission whether or not the
button is visible.
Before you begin
- Have the street address, city, state, postal code, phone number, and contact email for the new site. PositiveForm asks for all of them before it will save.
- Know which time zone the site runs on. Class schedules at this location use it, so a wrong choice moves every class.
- Work in the organization the location belongs to. The name in the top-left corner is the organization you are adding to.
Steps
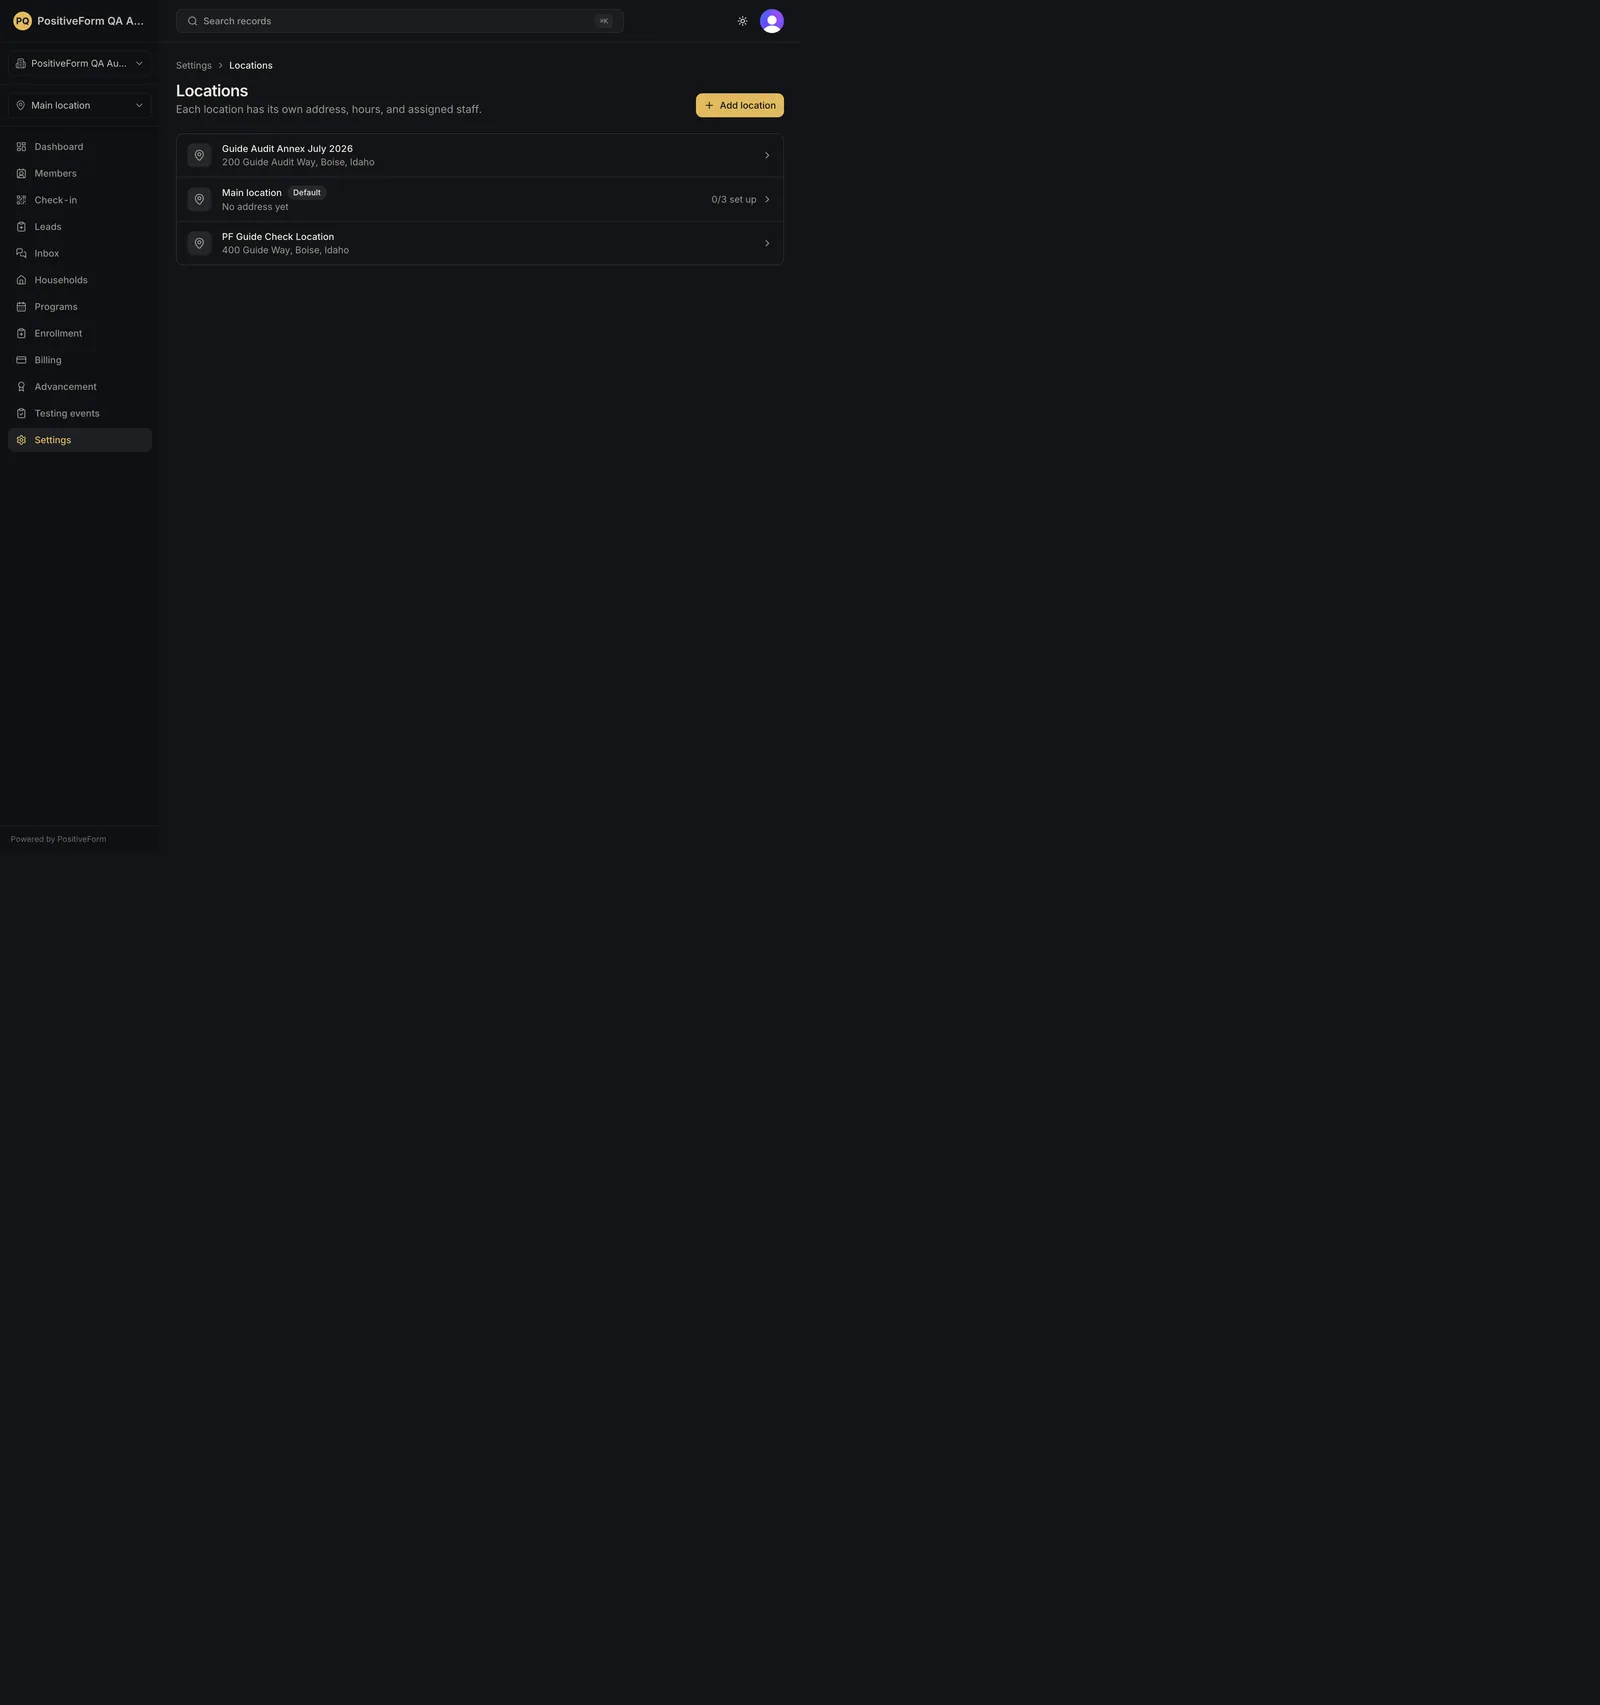
- Click Settings in the left navigation, then click Locations.
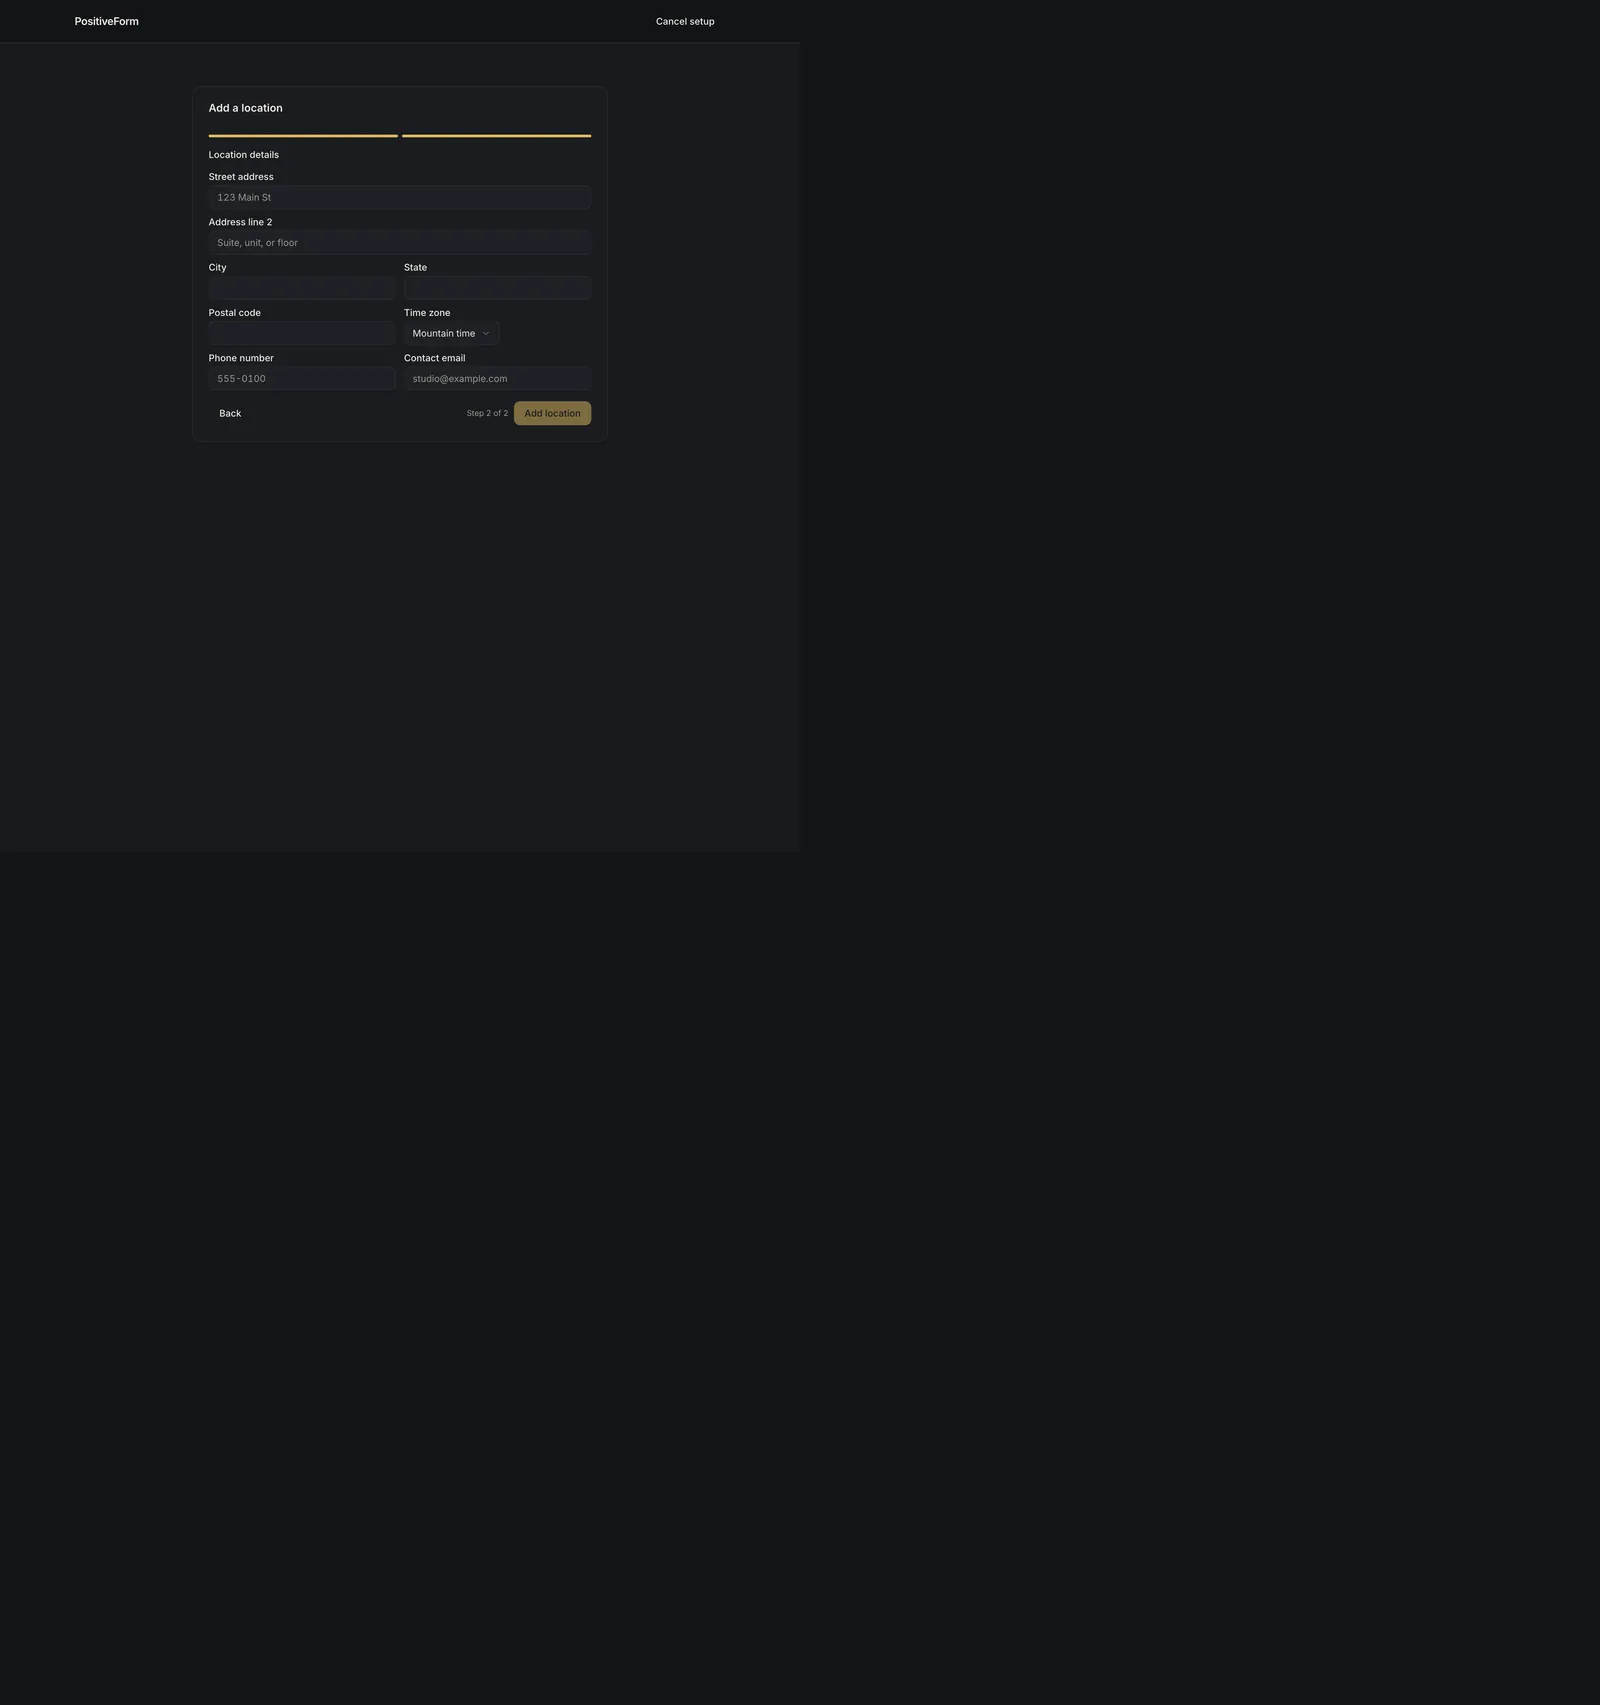
- Click Add location in the top right. The page changes to a focused setup screen titled Add a location. The step counter next to the button at the bottom of the card reads Step 1 of 2.
- Type the name families and staff will recognize into Location name, for
example
Downtown. Continue stays disabled until the name has content. - Click Continue. Location details opens as Step 2 of 2.
- Fill in Street address, City, State, and Postal code. Use Address line 2 for a suite, unit, or floor, or leave it empty.
- Check Time zone. It starts on your organization's time zone; change it only when this site actually runs on a different one.
- Fill in Phone number and Contact email. These are the details families see for this site, not your personal contact details.
- Click Add location. It stays disabled until every field above except
Address line 2 is filled and the contact email contains an
@.
Your answers are saved on this device as you type, so you can close the page part-way through and pick the same draft back up. Cancel setup, in the top right of the setup header, discards that draft on purpose.
Add location in the location selector opens the same two steps, so you can
start from wherever you are working rather than going to Settings first. It
appears there only for a role that carries locations.manage. Either way you
return to where you started once the location is added.
Expected outcome
PositiveForm confirms with Location added and returns you to where you started, which is Settings › Locations when you began there. The new site is listed with its address.
The location is immediately real: it appears in the location selector in the sidebar (in the header on a phone), in location filters on records pages, and as a choice when you schedule programs or check members in.
Because you filled in the address, phone, and contact email during setup, the new location is listed with its address and no setup reminder. A location still missing any of those three is listed with a counter such as 0/3 set up instead. Continue in Maintain or retire a location to add hours of operation and staff.
Screenshots
Recovery
If Add location stays greyed out, one required field is still empty or the
contact email has no @. Check Street address, City, State,
Postal code, Phone number, and Contact email. Address line 2 is
the only optional field.
If saving fails, PositiveForm shows Could not add location with the reason from the server, and nothing is created. Correct what the message names and click Add location again. Do not start over from Settings › Locations; your answers are still on the step.
To stop without creating anything, click Cancel setup in the top right of the setup header. That clears the saved draft and returns you to where you started.
If the location was created but the details are wrong, do not add a second one. Open it from Settings › Locations and correct it there, as described in Maintain or retire a location.
Related guides
- Maintain or retire a location — finish this location's profile, set its hours, assign staff, or retire it later.
- Switch operating locations — switch the console to the new location so you see its members, check-ins, and billing.